Thorp Air Command - T18.net

Supporting Owners, Builders and Pilots of the Thorp T-18 and its variants.
It is currently Tue Mar 19, 2024 4:21 am

All times are UTC - 6 hours [ DST ]


Post new topic Reply to topic  [ 32 posts ]  Go to page Previous  1, 2, 3  Next
Author Message
jrevens
PostPosted: Thu Apr 13, 2017 11:55 am 
Sr. Member
Sr. Member
User avatar

Joined: Thu Oct 22, 2009 10:13 pm
Posts: 789
Location: USA
Lou wrote:
I think we are all going to miss the lead...


I won't miss the lead... picking it out of sparkplugs, the crap all over the tops of pistons, combustion chamber, valves, etc. I'll miss the smell of 100LL.

I hope you can make it to Sedona, Lou. I'm gonna' drive with my wife this year - she just got the ok for some careful occasional transitions from a wheelchair to a walker. It's been a long haul... 7 operations on her hip in a little over a year & a half. I have to try to get her out as much as I can. We're excited about the trip and being able to see everyone. I am going to fly the T-18 to OSH this year though. It'll be the 20th time I've flown it there... nice round number.

_________________
John Evens
Arvada, Colorado

T-18 N71JE (sold)
Kitfox 7 SS N27JE


Top
 Profile  
 
Rich Brazell
PostPosted: Thu Apr 13, 2017 10:32 pm 
Hero Member
Hero Member

Joined: Wed Oct 21, 2009 12:33 pm
Posts: 3095
Images: 64
Location: Jamul, CA (San Diego area)
Sorry Lou I haven't made it to the airport . My plan is to go Thursday morning take a pic or two and measure the opening . I have the Mike Archer Classic Sport tank so my sending unit may not be in the same place as yours ? It's been a few years since I put in the panel , but if I remember right during the building process (much easier now than later) while the inst. panel was out I had a clear view (with a good flashlight) of where the sending unit sat while the tank was in the cradle and under the cowl . Pretty sure I put a magnet on a stick and located the center of the SU as best I could . When I was satisfied as to the location I used a magnet on the outside of the cowl to locate the center of the hole cut . When I cut the hole which was between the two stiffeners/stringers I was pretty close to dead on . :o

As aside note I have my fuel gauge calibrated to less than a gallon of being "accurate" and use the gauge as a trend instrument along with time and my Flight Data Systems fuel flow meter . I would use the time only method for a one time ferry flight to get home for repairs with known light winds and one or two extra fuel stops . At the least an aircraft should have a fuel sight gauge as a minimum . Maybe it's just me , but I would like to know if my fuel gauge is telling me that I may have a fuel leak FWF ? ??? 
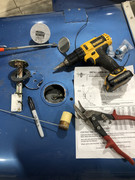
This tired old arse doesn't need another "fuel vent !"
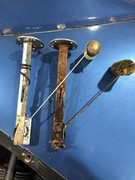
RB O0
FUMES


Top
 Profile Personal album  
 
Jeff J
PostPosted: Fri Apr 14, 2017 7:50 am 
Sr. Member
Sr. Member

Joined: Wed Aug 31, 2016 8:18 am
Posts: 583
Images: 0
Location: eastern OK
jrevens wrote:

I won't miss the lead... picking it out of sparkplugs...


I'd like to figure out why some engines have such a problem. We frequently run a set of plugs 300-400 hours without cleaning or gapping and they usually aren't that dirty. Sometimes we only change half the plugs at that point but at 400 hours there normally isn't a lot of electrode left. On those engines we have the fuel pressure (fuel injected) cranked up to max and we never lean (almost never fly above 1800' msl either). I am in the middle of topping one of those engines at TBO. I used to annual a Tomahawk for a guy and his plugs would be packed full to the point of wondering how they ever made spark. I don't think the Tomahawk flew 30 hours between inspections. I will be inspecting a Skyhawk in the next week or so and his plugs are usually not to bad. Some of it is likely connected to power settings. The aircraft going 300+ hours between inspections spend very little time taxiing and generally only idle long enough to get some heat into the oil or bring the CHT back up into the green.

Of course, from what I can tell, the easy fix to lead on the plugs is to switch to electronic ignition and run the automotive plugs or burn mogas. I hate to give up the false sense of security the screw on spark plug leads give me but everything I hear and read concerning electronic ignition is great. Some can even be hand propped if you have a 9 volt battery handy (my ANR uses 9 volt).

I don't think we will ever be free of carbon build up. Even modern car engines get some.

_________________
Thorp T18
O-320-B3B (160 HP)
68x74 Sterba Propeller

"The joke in aviation is, 'If you want to make a million, you'd better start with £10m.' " -Bruce Dickinson


Top
 Profile Personal album  
 
dan
PostPosted: Fri Apr 14, 2017 10:42 am 
Sr. Member
Sr. Member

Joined: Wed Oct 21, 2009 9:30 am
Posts: 898
Images: 0
Location: USA
I run the 100LL when away from home when I have to, but for the past probably 4-6 yrs been running 91 Mo gas, no lead on plugs. I recently went electronic on the right side mag and I use auto plugs on all of the bottom plugs (2 bucks each) and also The harness for the electronic mag is automotive. The auto wiring has to be tugged loose from the plug, they are tight. This arrangement thus far has proved to be effective to say the least, however, the electronic maxes at 34deg before TDC, and as we all know the Mag at 25deg. Dan


Top
 Profile  
 
Rich Brazell
PostPosted: Fri Apr 14, 2017 2:26 pm 
Hero Member
Hero Member

Joined: Wed Oct 21, 2009 12:33 pm
Posts: 3095
Images: 64
Location: Jamul, CA (San Diego area)
Attachment:
Fuel access cover T-18 005.JPG
Fuel access cover T-18 005.JPG [ 117.97 KiB | Viewed 11600 times ]
Attachment:
Fuel access cover T-18 004.JPG
Fuel access cover T-18 004.JPG [ 123.95 KiB | Viewed 11600 times ]
Here you go Mr. Lou...pics of my fuel sender access cover . A little tuff to see in the one pic as I am doing touch up painting. :o

1. Diameter of cover 3 1/16" .
2. Distance between screws 1.5 "
3. Material same thickness as the cowl . 0.032 ?

RB O0


Top
 Profile Personal album  
 
Jeff J
PostPosted: Sun Apr 30, 2017 6:52 am 
Sr. Member
Sr. Member

Joined: Wed Aug 31, 2016 8:18 am
Posts: 583
Images: 0
Location: eastern OK
That looks like good work but it appears to me like the panel drops out to the inside of the aircraft in a hard to reach place. Is that actually the case?

_________________
Thorp T18
O-320-B3B (160 HP)
68x74 Sterba Propeller

"The joke in aviation is, 'If you want to make a million, you'd better start with £10m.' " -Bruce Dickinson


Top
 Profile Personal album  
 
Rich Brazell
PostPosted: Sun Apr 30, 2017 8:07 am 
Hero Member
Hero Member

Joined: Wed Oct 21, 2009 12:33 pm
Posts: 3095
Images: 64
Location: Jamul, CA (San Diego area)
Short answer...yes/no . ??? Remove screws , slide cover to the right to expose the SU . Do your business , then slide the cover back to the hole . Lift into position and replace the screws . :P BING BANG BOOM !

RB O0


Top
 Profile Personal album  
 
SHIPCHIEF
PostPosted: Fri Jan 18, 2019 2:02 am 
Sr. Member
Sr. Member

Joined: Tue Nov 29, 2011 9:05 pm
Posts: 471
Location: USA
Well....
I used the dowel (aka Fuel dipstick) to sight along the fill opening towards the fuel sender inside the tank, then measure the distance etc.
I missed. The errant hole can be seen near the tip of the snips.
Here is a pic of the progress/damage and the new part.
I know! I'll made that hole Oval Shaped so I can fit a doubler inside and tell everyone that was my plan all along! ;)
Image

_________________
Scott Emery
EAA Chapter 326
T-18 N18TE


Top
 Profile  
 
SHIPCHIEF
PostPosted: Fri Jan 18, 2019 4:32 pm 
Sr. Member
Sr. Member

Joined: Tue Nov 29, 2011 9:05 pm
Posts: 471
Location: USA
Some progress installing the fuel level sender. It's a Stewart Warner 391B-F, direct replacement for the original.
The old sender used an O ring seal at the top. The new sender is larger and seals with a gasket. I had to use a die grinder to increase the size of the opening. I followed the directions adjusting the length of the bracket and the length of the float arm. Power-on testing looks great. The original meter works smoothly. The float stops about 1/4" from the bottom and just tops out at Full like it's supposed to. I think it will read empty with 3 or 4 gallons remaining in the tank. Better to be on the safe side...

Image

Image

_________________
Scott Emery
EAA Chapter 326
T-18 N18TE


Top
 Profile  
 
James Grahn
PostPosted: Fri Jan 18, 2019 7:46 pm 
Hero Member
Hero Member

Joined: Sat Oct 24, 2009 7:16 pm
Posts: 1431
Images: 0
Location: USA
Doah! Well that can be repaired.
Cubes


Top
 Profile Personal album  
 
SHIPCHIEF
PostPosted: Sat Jan 19, 2019 6:39 pm 
Sr. Member
Sr. Member

Joined: Tue Nov 29, 2011 9:05 pm
Posts: 471
Location: USA
I made use of the ‘Oval‘ access hatch by adding a fuel fill fitting:
This bulkhead fitting can receive fuel (through the check valve in the picture) from a pump and auxiliary tank.
The fitting is positioned such that I can (just) get a wrench on it when the doubler plate, taking shape to the left, is riveted in.
Image

_________________
Scott Emery
EAA Chapter 326
T-18 N18TE


Top
 Profile  
 
Ryan Allen
PostPosted: Sat Jan 19, 2019 7:46 pm 
Hero Member
Hero Member
User avatar

Joined: Wed Oct 21, 2009 6:10 pm
Posts: 1104
Images: 0
Location: Louisiana
how do you get that permanent marker off your finished paint job?


Top
 Profile Personal album  
 
david read
PostPosted: Sat Jan 19, 2019 7:52 pm 
Sr. Member
Sr. Member

Joined: Tue Oct 20, 2009 9:21 pm
Posts: 225
Location: USA
It will wipe right off with laquer thinner


Top
 Profile  
 
Ryan Allen
PostPosted: Sun Jan 20, 2019 7:12 pm 
Hero Member
Hero Member
User avatar

Joined: Wed Oct 21, 2009 6:10 pm
Posts: 1104
Images: 0
Location: Louisiana
well I'll be, I didn't know that. thanks.


Top
 Profile Personal album  
 
SHIPCHIEF
PostPosted: Thu Feb 14, 2019 1:16 pm 
Sr. Member
Sr. Member

Joined: Tue Nov 29, 2011 9:05 pm
Posts: 471
Location: USA
Update;
The irregular cover shape is partially because of the stiffener under the skin on the port side (right side in top pic). The doubler has a joggle to lay under the angle stiffener to add strength. Those rivet holes are machine countersunk, the others are dimpled. (except the plate-nut rivets, they are countersunk too)
The size of the sender unit flange dictates the size of the opening in the doubler plate and wider rivet spacing.
A bit more work to do on the cover...
Image

Image

_________________
Scott Emery
EAA Chapter 326
T-18 N18TE


Top
 Profile  
 
Display posts from previous:  Sort by  
Post new topic Reply to topic  [ 32 posts ]  Go to page Previous  1, 2, 3  Next

All times are UTC - 6 hours [ DST ]


Who is online

Users browsing this forum: No registered users and 1 guest


You cannot post new topics in this forum
You cannot reply to topics in this forum
You cannot edit your posts in this forum
You cannot delete your posts in this forum
You cannot post attachments in this forum

Search for:
Jump to:  

[ Time : 0.128s | 15 Queries | GZIP : On ]